The secret third option for Serverless WebSockets on AWS
If you're looking to send live data to and from a web frontend, you've probably already seen AWS services like API Gateway or AppSync. If you're particularly curious, you may even have come across AWS IoT Core - but if you're anything like me, you were put off by seemingly complex requirements, like articles explaining the supposed need to setup Cognito and register each of your users as an IoT "thing". Through more research, I eventually realised this wasn't the case. In fact, IoT Core can be one of the easiest and most powerful options for Serverless WebSockets on AWS. I've mentioned being a fan of this approach a few times recently, and when people asked about where they could learn more, I couldn't find anything that went through the basics in a way I liked. This post is the one I wish I had found!
Why not use API Gateway or AppSync?
From a marketing perspective, these two services definitely seem like the most fit for a web frontend. Unlike IoT Core, which gives the impression of being specifically for lower level devices, these services are brought up in the context of APIs and even integrate with AWS' web platform Amplify. However, they do have some limitations.
One of the biggest limitations of API Gateway for me was the lack of broadcast behaviour. To send a message to all clients, I'd need to keep track of connections, and then use the API to individually post a message to each of them. That's a lot of work and also exactly the type of extra complexity that I try to avoid.
AppSync is a fairly good candidate but is unashamedly designed around GraphQL. If you're already using GraphQL, it may be the best option. If you're not, however, GraphQL can get in the way a little bit. You'll need to setup a local resolver which includes defining GraphQL datatypes and mutations just to be able to send messages. You'll also need to use GraphQL syntax on the frontend which usually isn't what I'm going for - unless I'm specifically using that for a project.
I'm in! Tell me about IoT Core.
IoT Core offers serverless messaging between your clients and backend, billed primary by connection minutes and messages sent (more here). Using the MQTT over WSS option, we get the web-compatible connection protocol we're looking for. MQTT is an IoT protocol which has some pros and cons for the web use case - it adds an extra dependency, since we'll need either the AWS SDK or MQTT.js to be able to speak to the server in a language it understands. That said, it does add some extra QoL options, like being able to store messages for when a device next comes online. It'd be nice if IoT Core supported pure WebSockets, but this is a tradeoff I'm personally ok with.
To try things out, head to IoT Core in the AWS Dashboard, and click "MQTT Test Client" in the sidebar. Subscribe to a topic ("test" for example), and publish to the same channel to see your messages received.
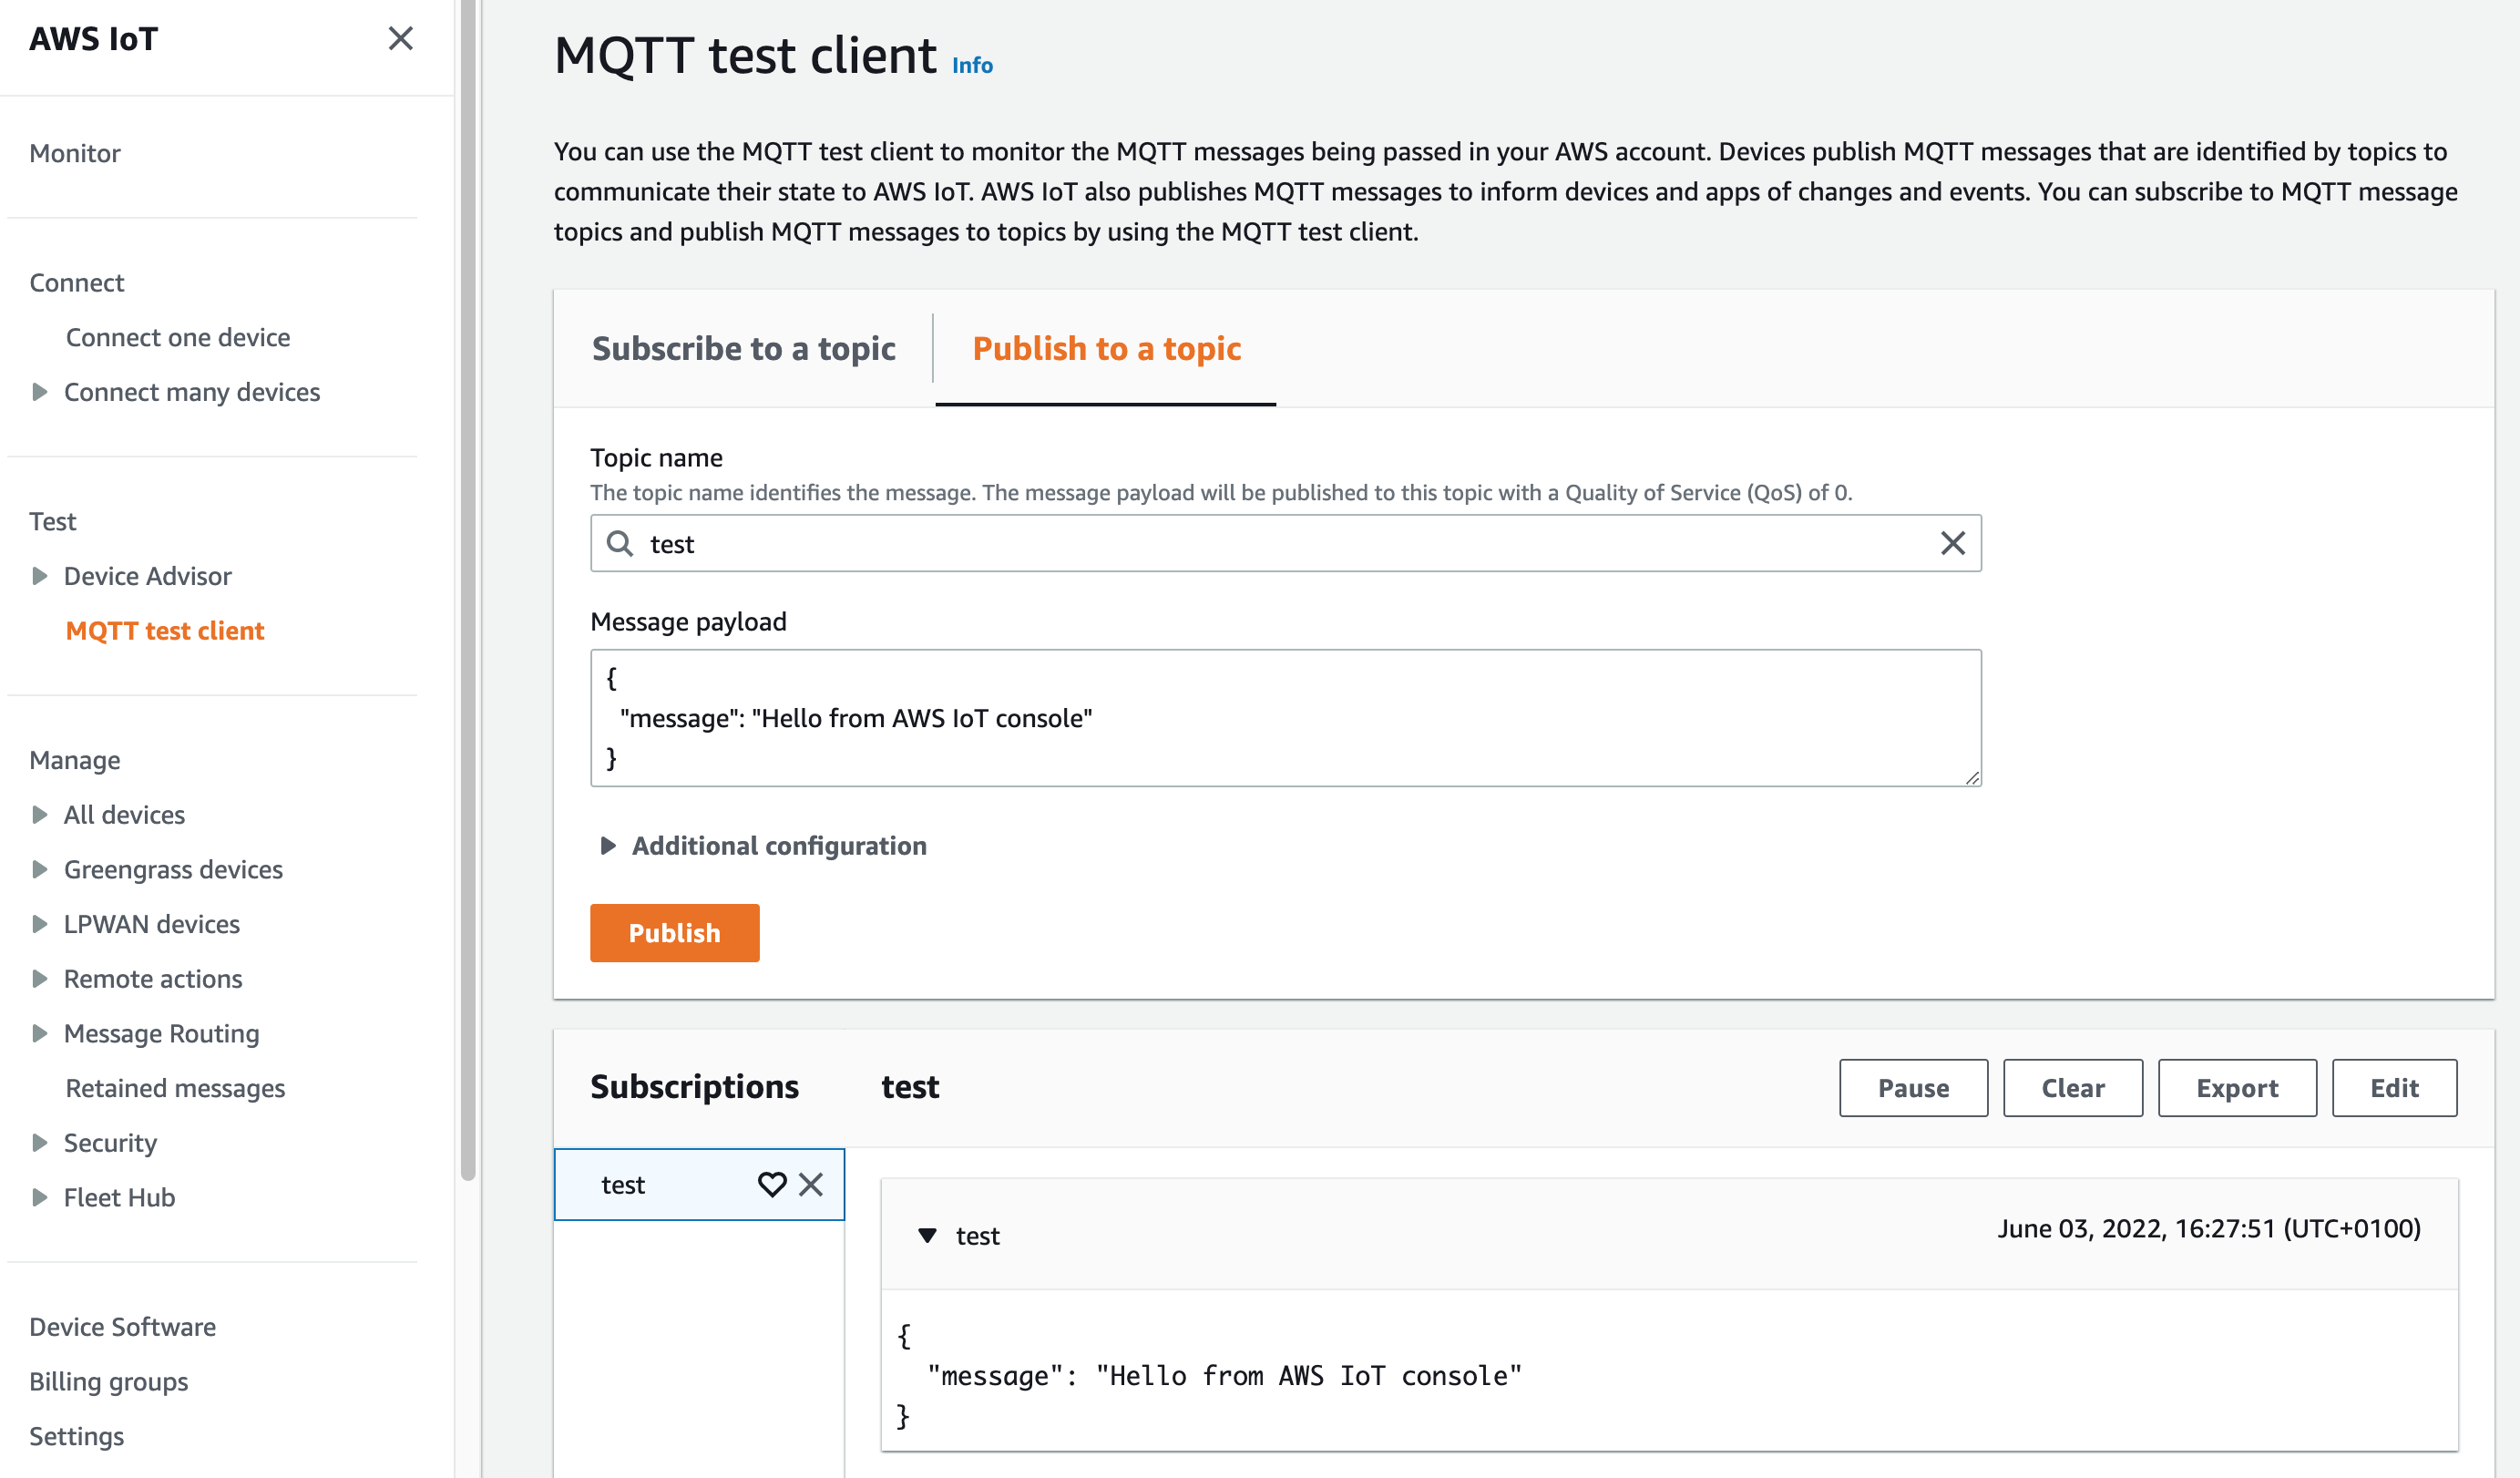
It's that simple! Notably, we're publishing to channels, rather than individual clients. While we can use IAM roles to prevent clients from subscribing to certain channels (more on that later), and therefore implement private messaging where needsbe, we can also easily broadcast to a whole number of users. By default the maximum number of clients that can receive a published request per second is 20,000. Even without increasing that limit, though, my understanding is that surpassing it simply fans the request out over a long period of time instead of preventing messages from getting delivered entirely.
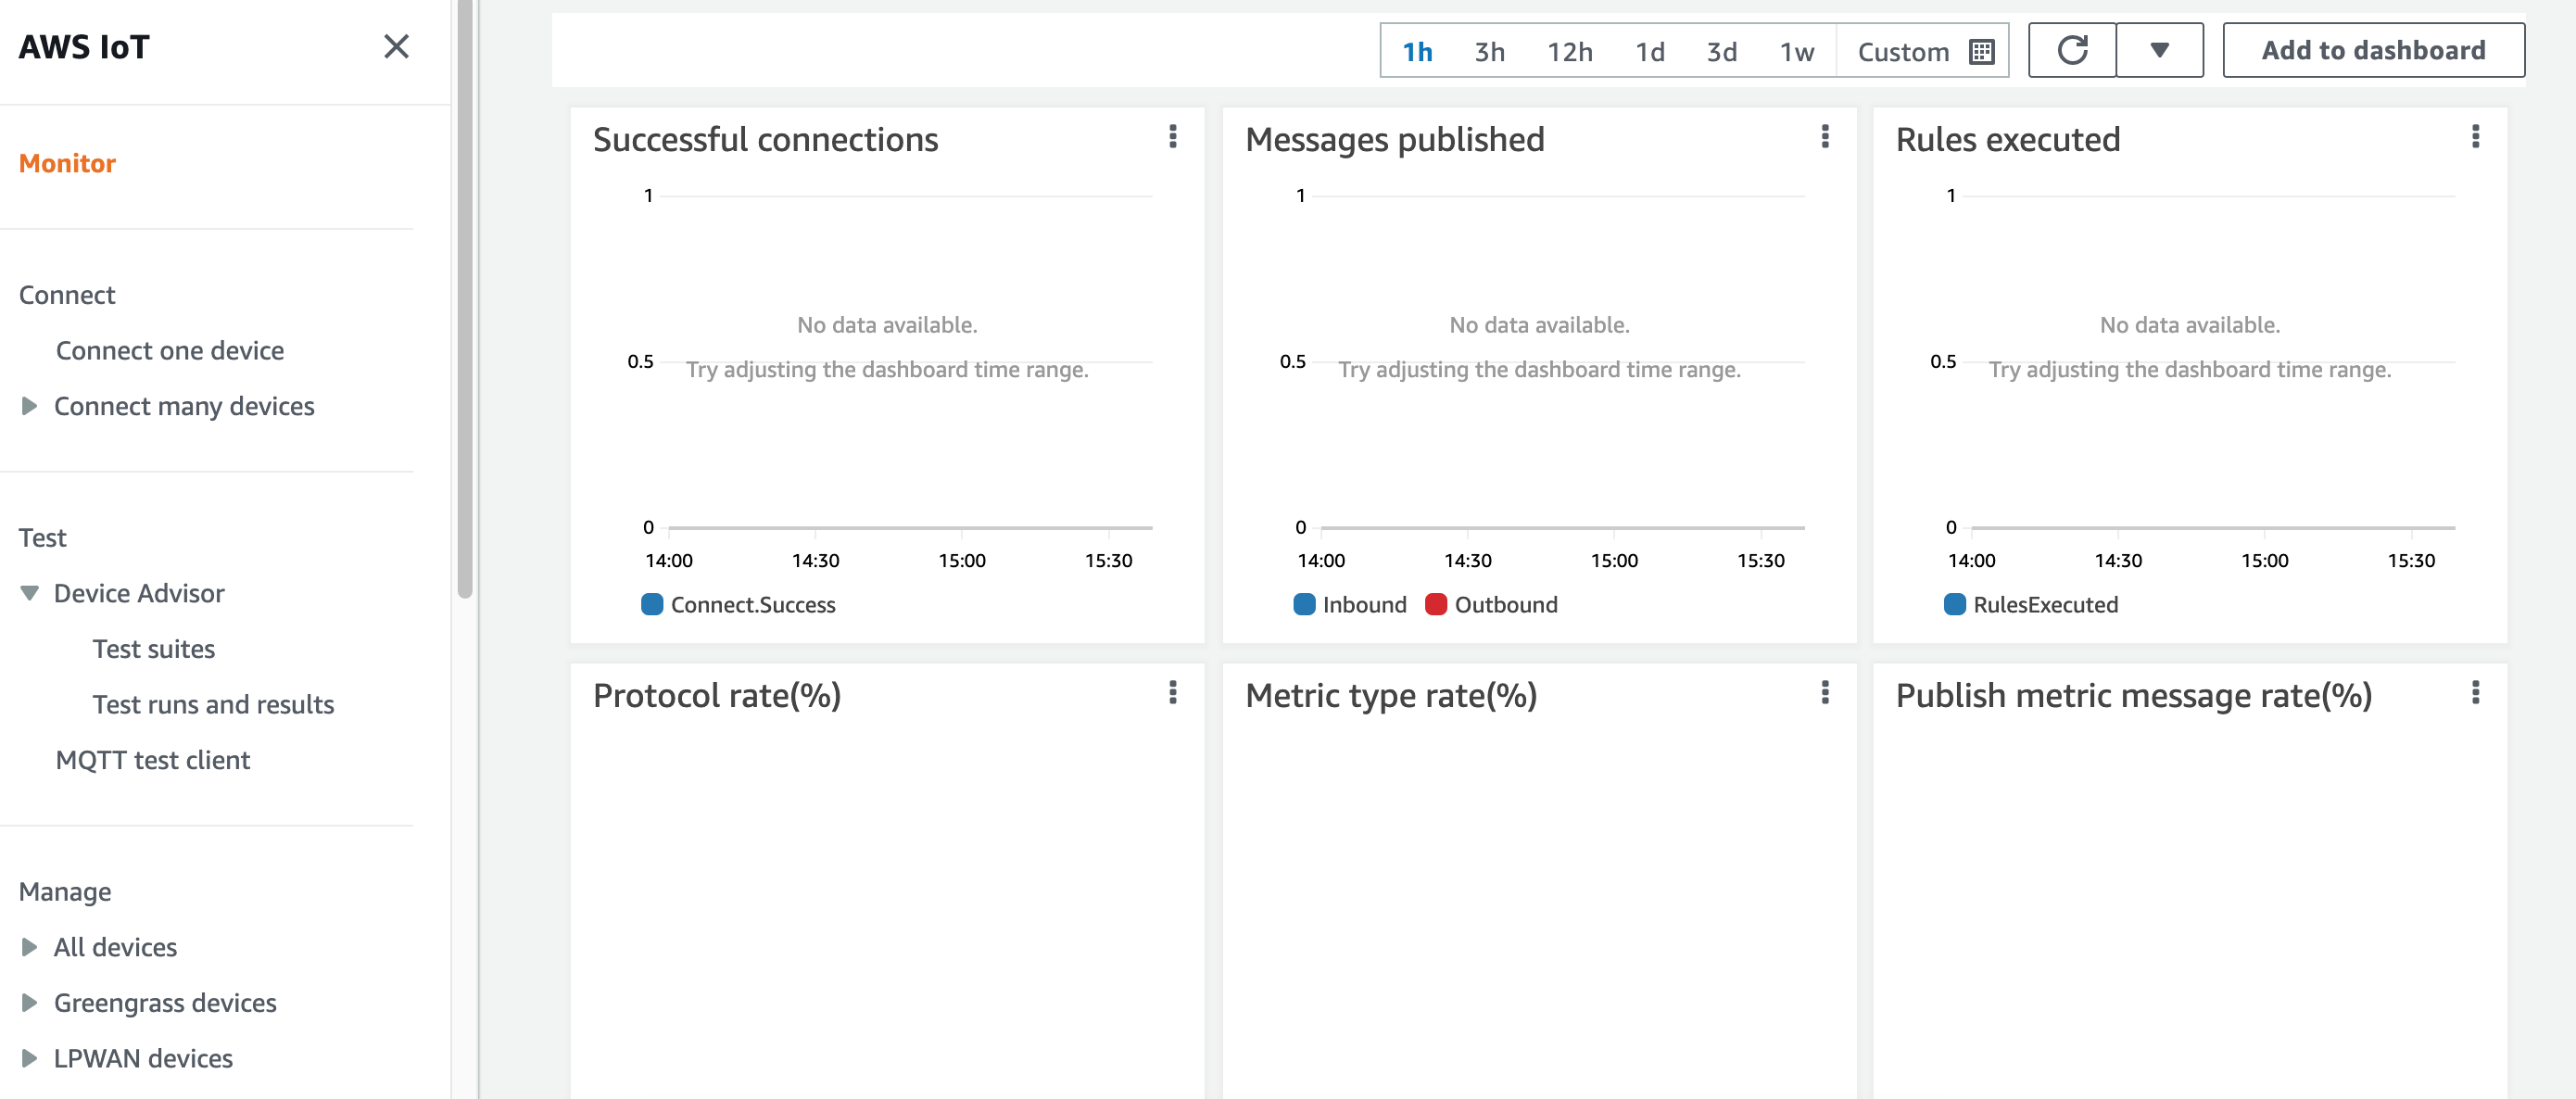
While we're here, it's also worth quickly mentioning the "Monitor" page. This pulls together a bunch of live data about what's happening in your account. Once you have things up and running and you're not in a test account like I am, this is pretty exciting to watch.
Let's set something up...
With a brief introduction to IoT Core out of the way, let's look at setting something up in the AWS dashboard. To begin, we'll setup an Authorizer, which is an AWS Lambda that checks the credentials provided by a user, decides if the connection is allowed, and determines what actions the user can perform.
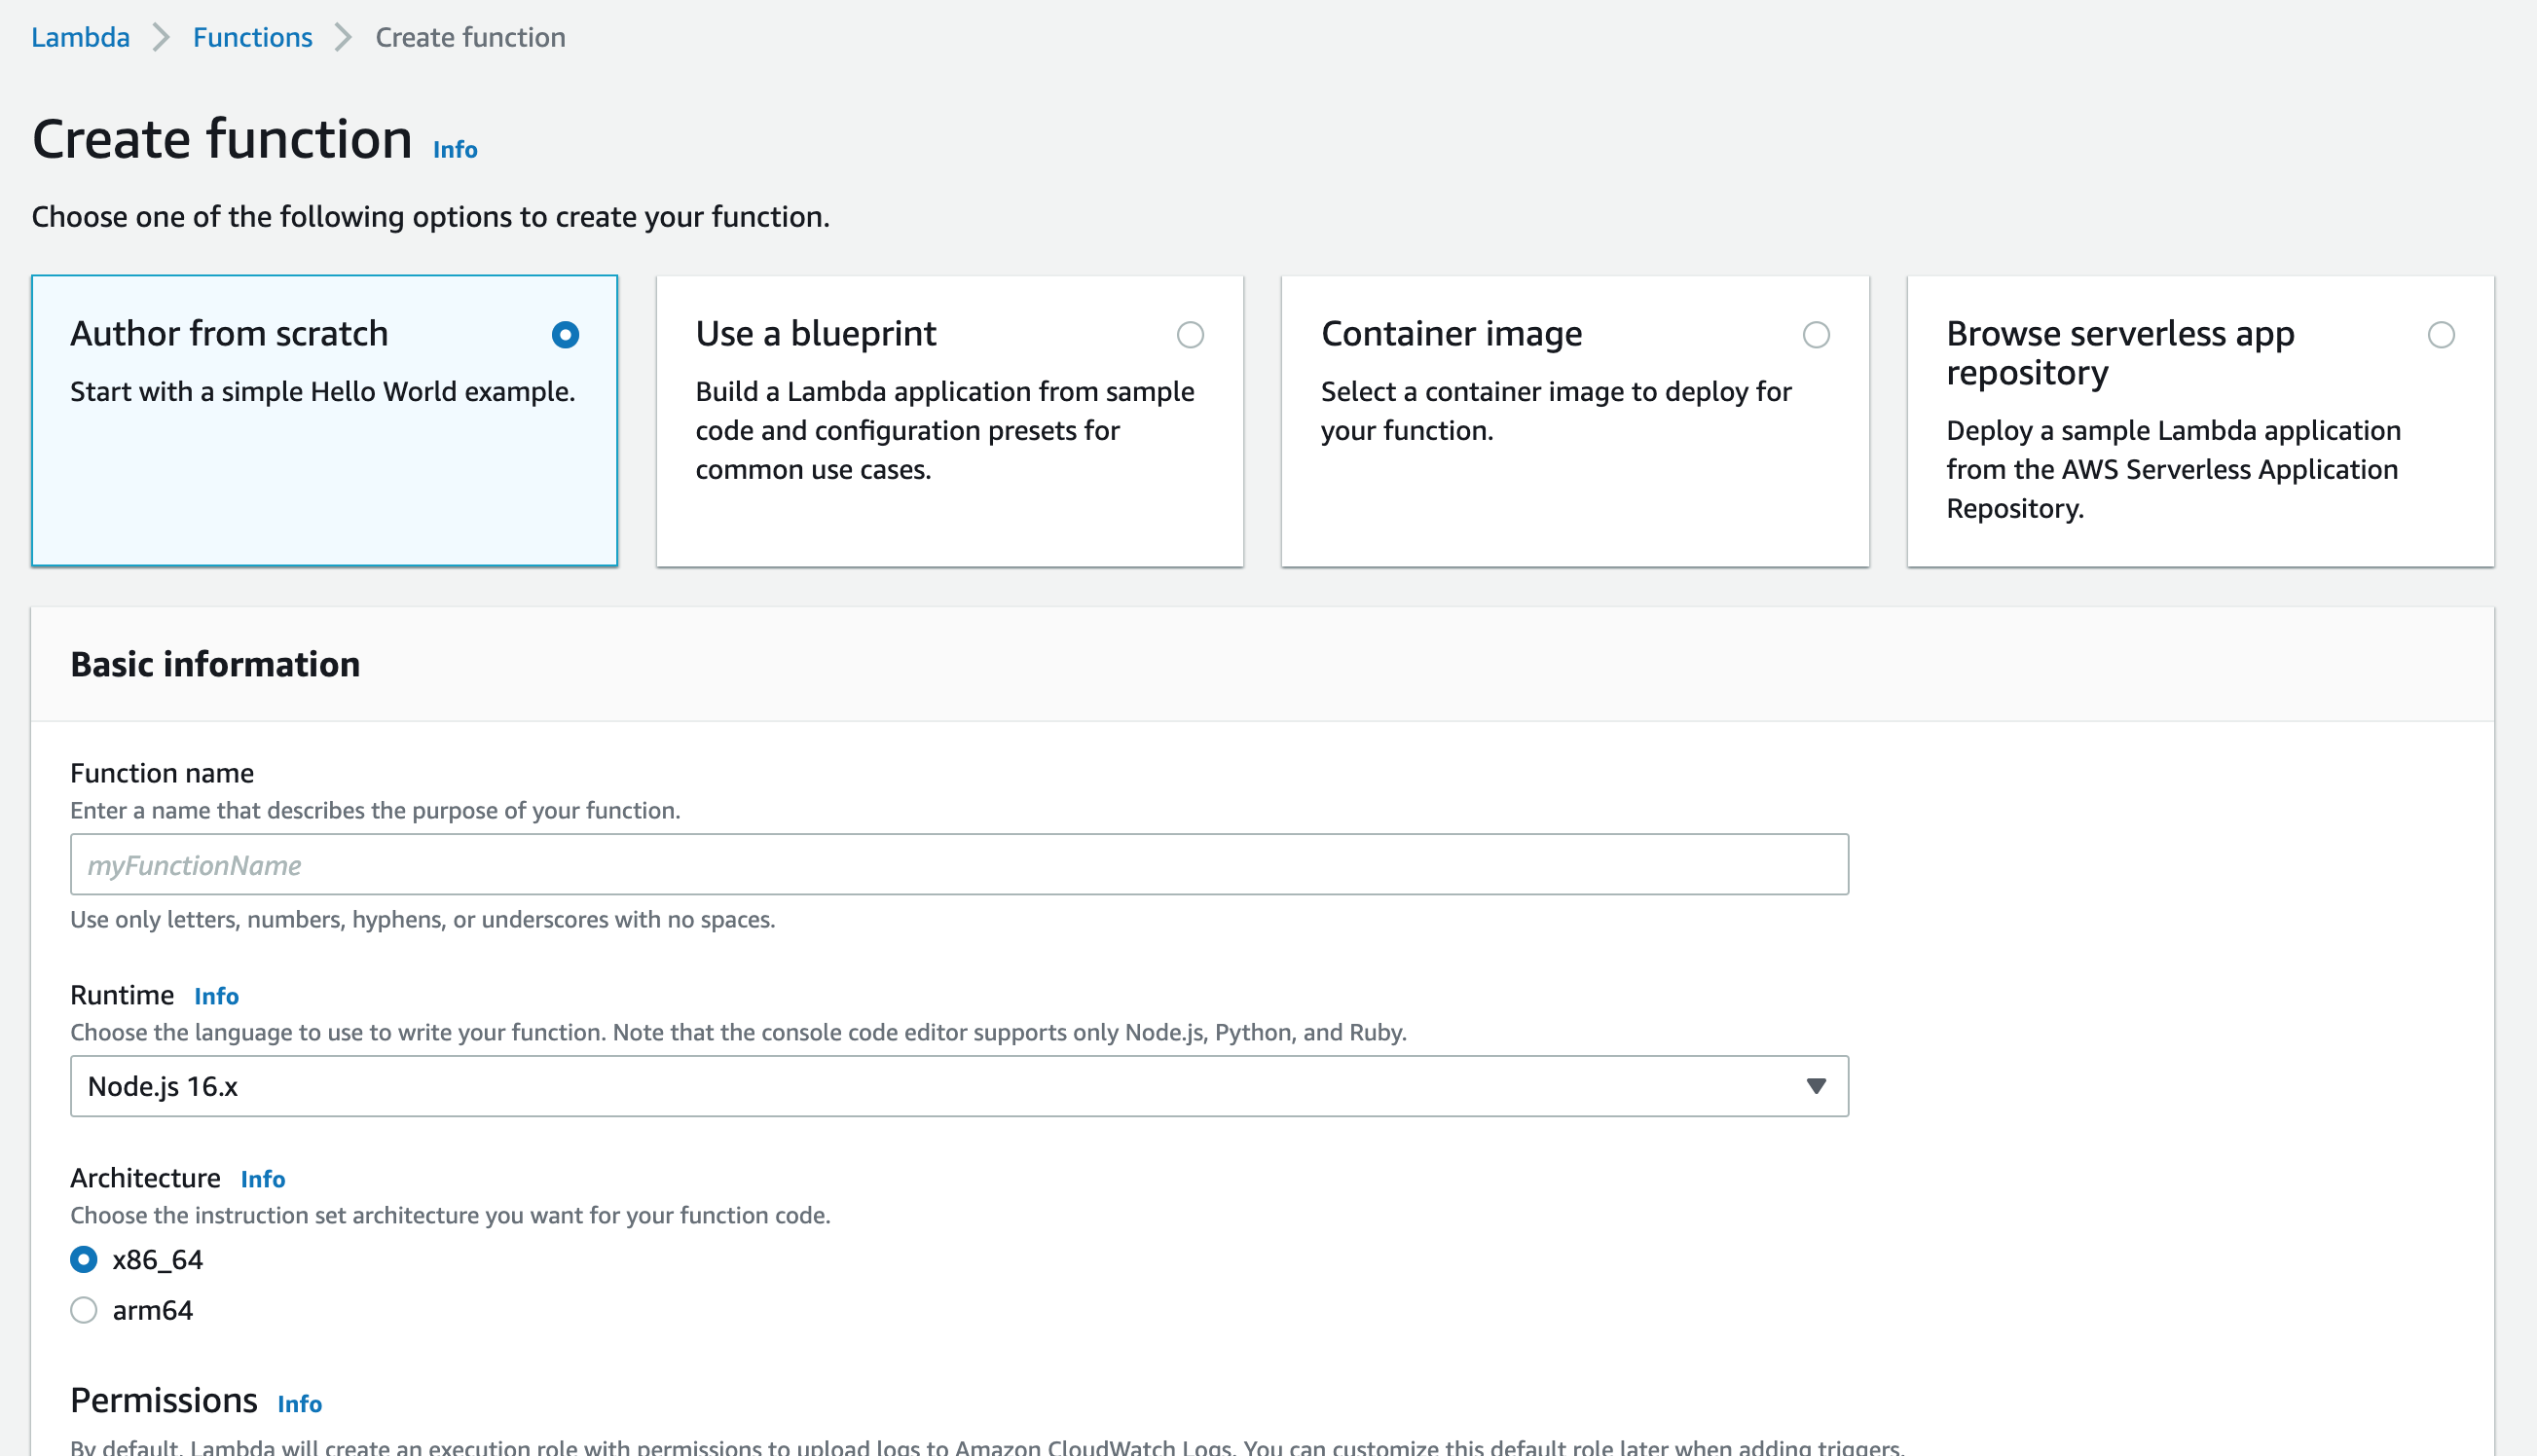
- Head to the Lambda section of the Console, and create a new function. Choose to author one from scratch using the Node.js 16.x runtime and a name of your choice. Click "Create Function".
- On the next page, in the code section, paste the following (replacing
[ACCOUNT_ID]as appropriate): - Press Deploy to save your changes.
exports.handler = async (event, _, callback) => {
    return ({
        isAuthenticated: true,
        principalId: 'Unauthenticated',
        policyDocuments: [
            {
                "Version": "2012-10-17",
                "Statement": [
                    {
                        "Effect": "Allow",
                        "Action": "iot:Connect",
                        // Allow the client to pick any client ID.
                        // In a real setup, this should be decided by the server.
                        "Resource": "arn:aws:iot:us-east-1:[ACCOUNT_ID]:client/*"
                    },
                    {
                        "Effect": "Allow",
                        "Action": "iot:Subscribe",
                        "Resource": [
                            "arn:aws:iot:us-east-1:[ACCOUNT_ID]:client/*",
                            "arn:aws:iot:us-east-1:[ACCOUNT_ID]:topicfilter/server"
                        ]
                    },
                    {
                        "Effect": "Allow",
                        "Action": "iot:Publish",
                        "Resource": [
                            "arn:aws:iot:us-east-1:[ACCOUNT_ID]:client/*",
                            "arn:aws:iot:us-east-1:[ACCOUNT_ID]:topic/client"
                        ]
                    }
                ]
            }
        ],
        disconnectAfterInSeconds: 3600,
        refreshAfterInSeconds: 300
    });
};
To keep things simple for this post, this Lambda has no credential checking. It returns a policy document allowing any clients that connect to subscribe to the "server" topic (implied by the topicfilter/server resource) and publish to the "client" one (implied by the topic/client resource). You could add multiple of these to allow users to subscribe to or publish to multiple topics they need access to.
Note: The client ID is used to uniquely identify a client. If two clients connect with the same ID, the later connection will close the previous one. Consequently, in a real setup the document returned should only allow connections from a unique ID guarenteed by authentication. I'm fairly sure (although not certain) that this is also used for messages that are resent, so re-using client IDs may have security implications too.
If you'd like to test this function, the following command quickly shows if the Lambda is returning a response that matches the required schema:
aws iot test-invoke-authorizer --authorizer-name=YourAuthorizerName --http-context "{}"
We now need to connect this Lambda to IoT Core...
- Switch to IoT Core in the AWS Console.
- Head to Manage > Security > Authorizers and click "Create Authorizer".
- Give it a name (I'll use "PublicAuthorizer") and choose "Active".
- Select the Lambda function you just created.
- Choose "Create".

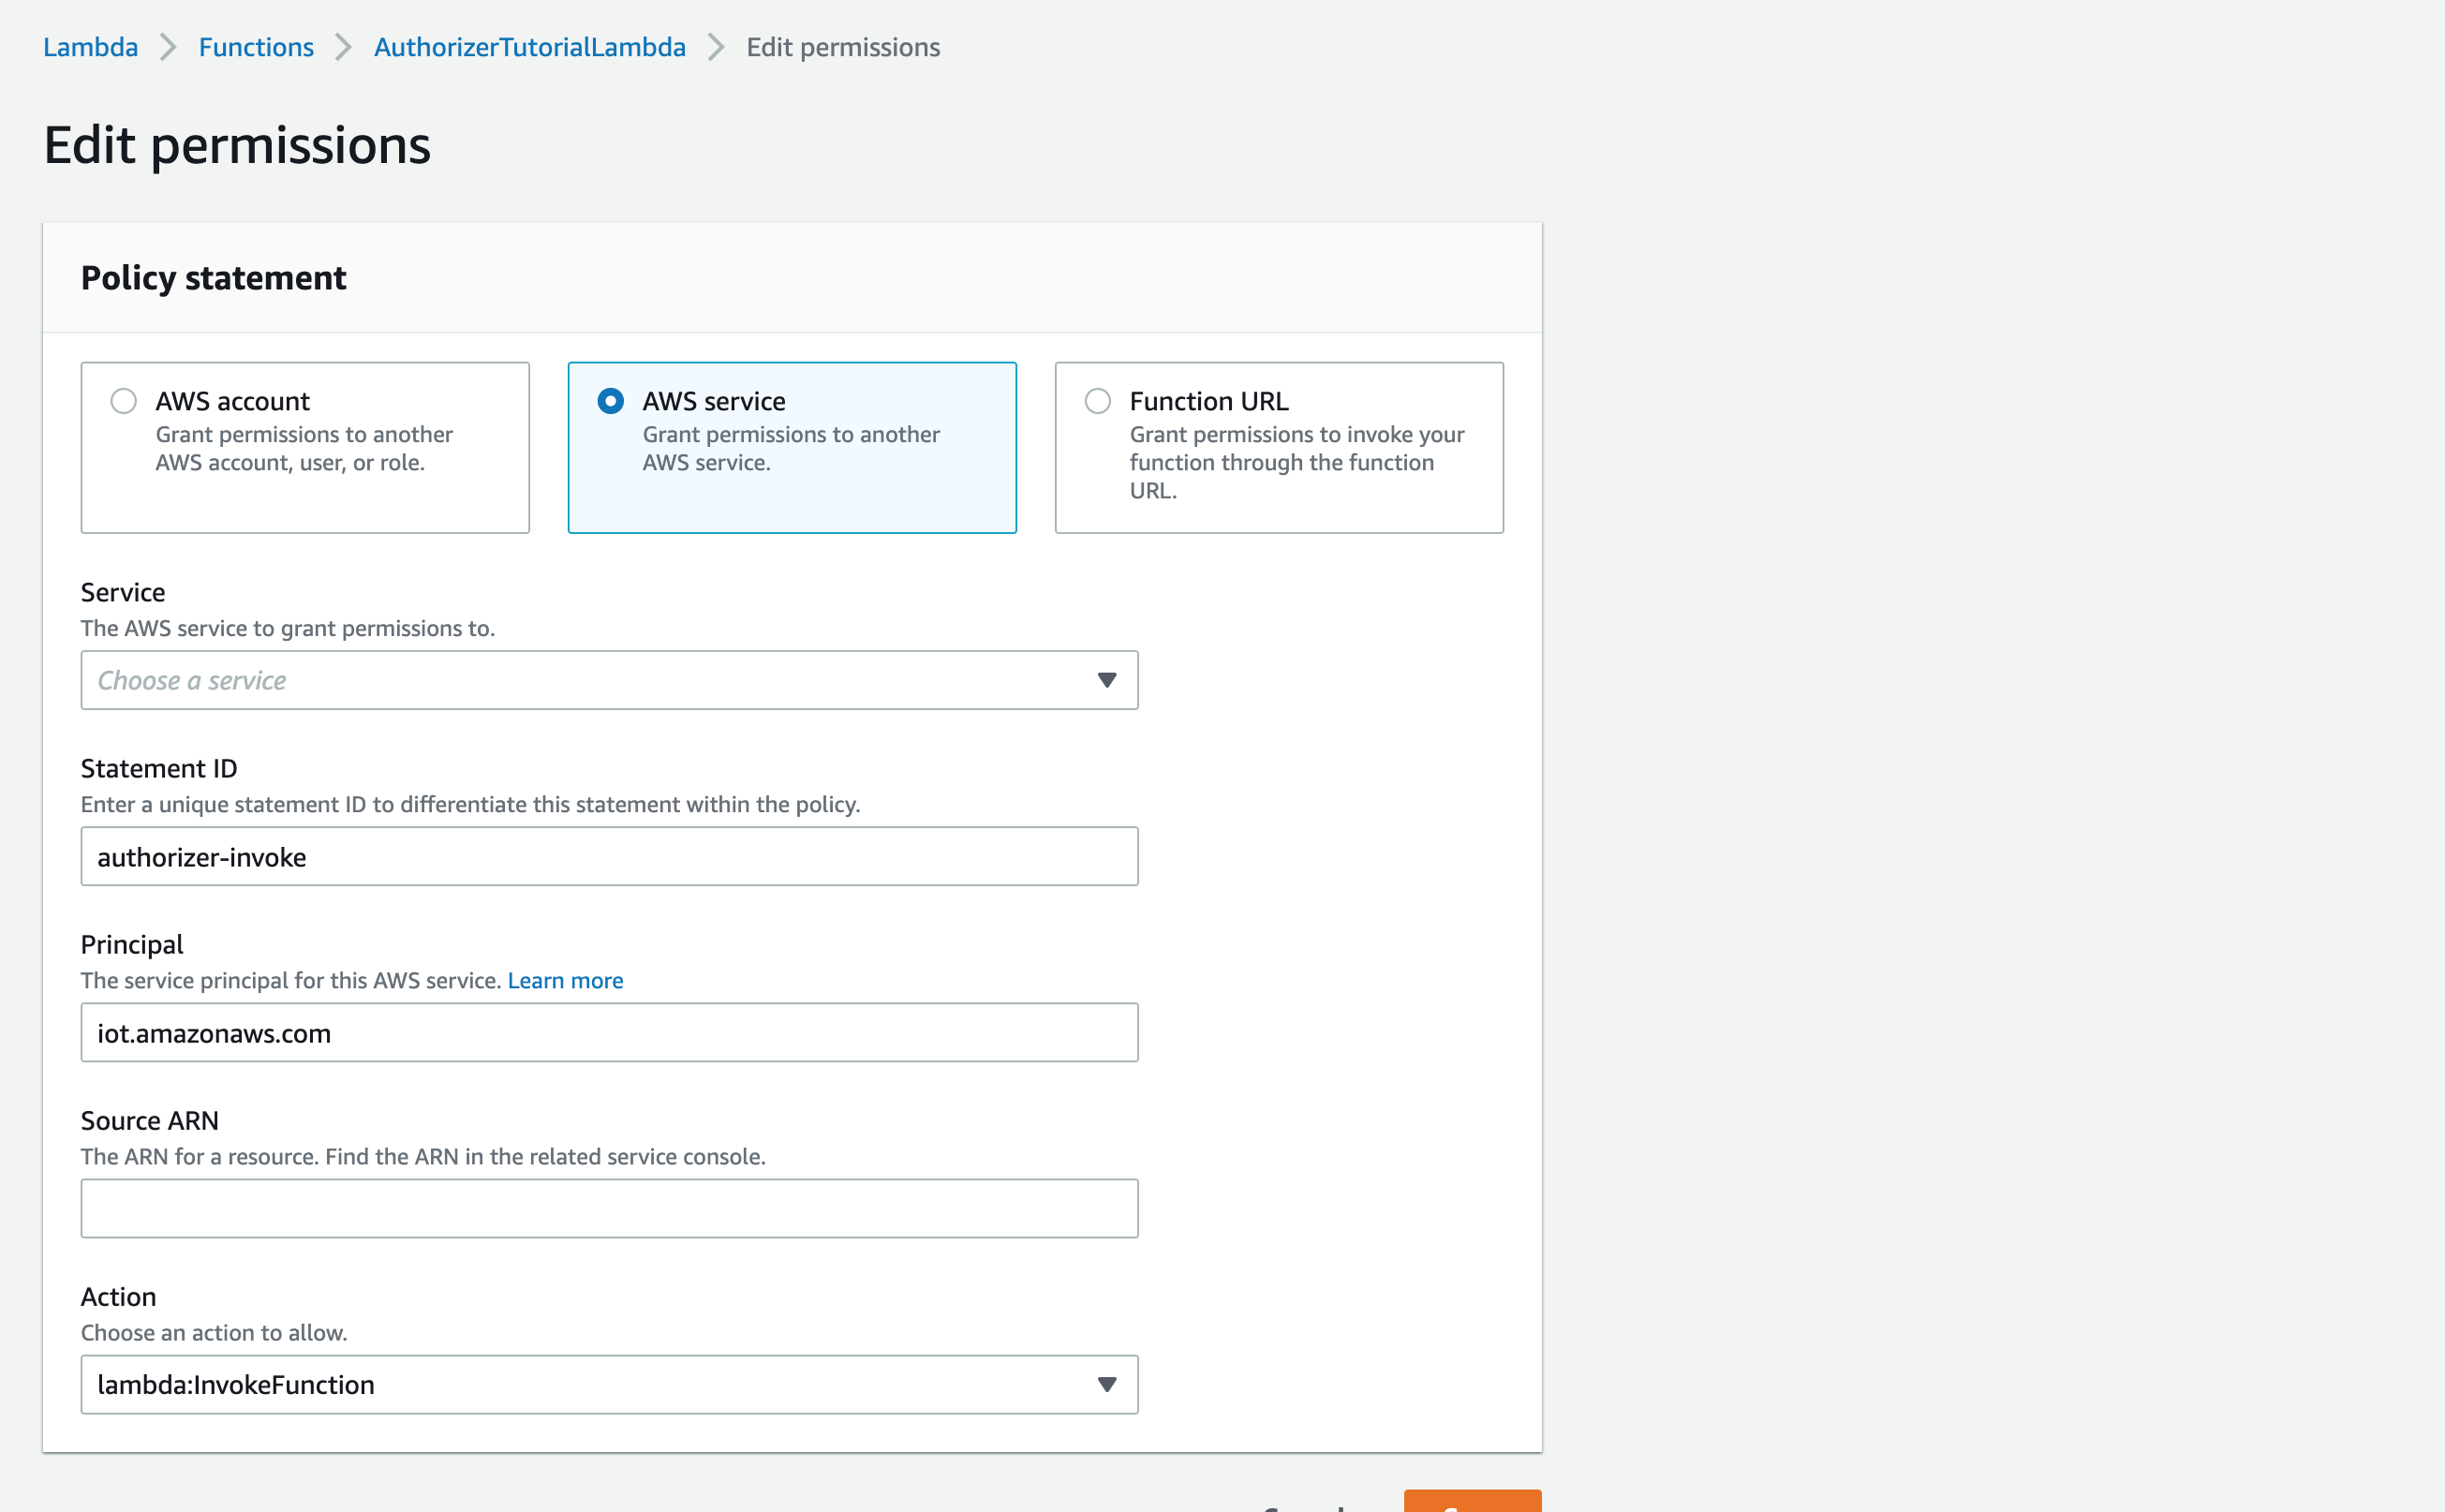
With an Authorizer created, give IoT Core permission to invoke the Lambda:
- Go to your Authorizer and copy the "Authorizer ARN".
- Go back to your Lambda.
- Under Configuration > Permissions, choose "Add Permissions".
- Choose AWS Service, select AWS IoT, and paste the copied ARN in to the Source ARN field. Allow the lambda:InvokeFunction action.
- Enter a unique Statement ID, and hit save.
Finally, we're good to go! Let's take things for a spin...
We could connect using one of the official AWS SDKs, but I personally find these a little clunky and would rather go as low-level as I can. With that in mind, I'll demonstrate connecting using the MQTT.js library.
- Add the following to an HTML file, replacing the endpoint with the one from the Settings section of the IoT Core Console, and the Authorizer name with the name you chose earlier.
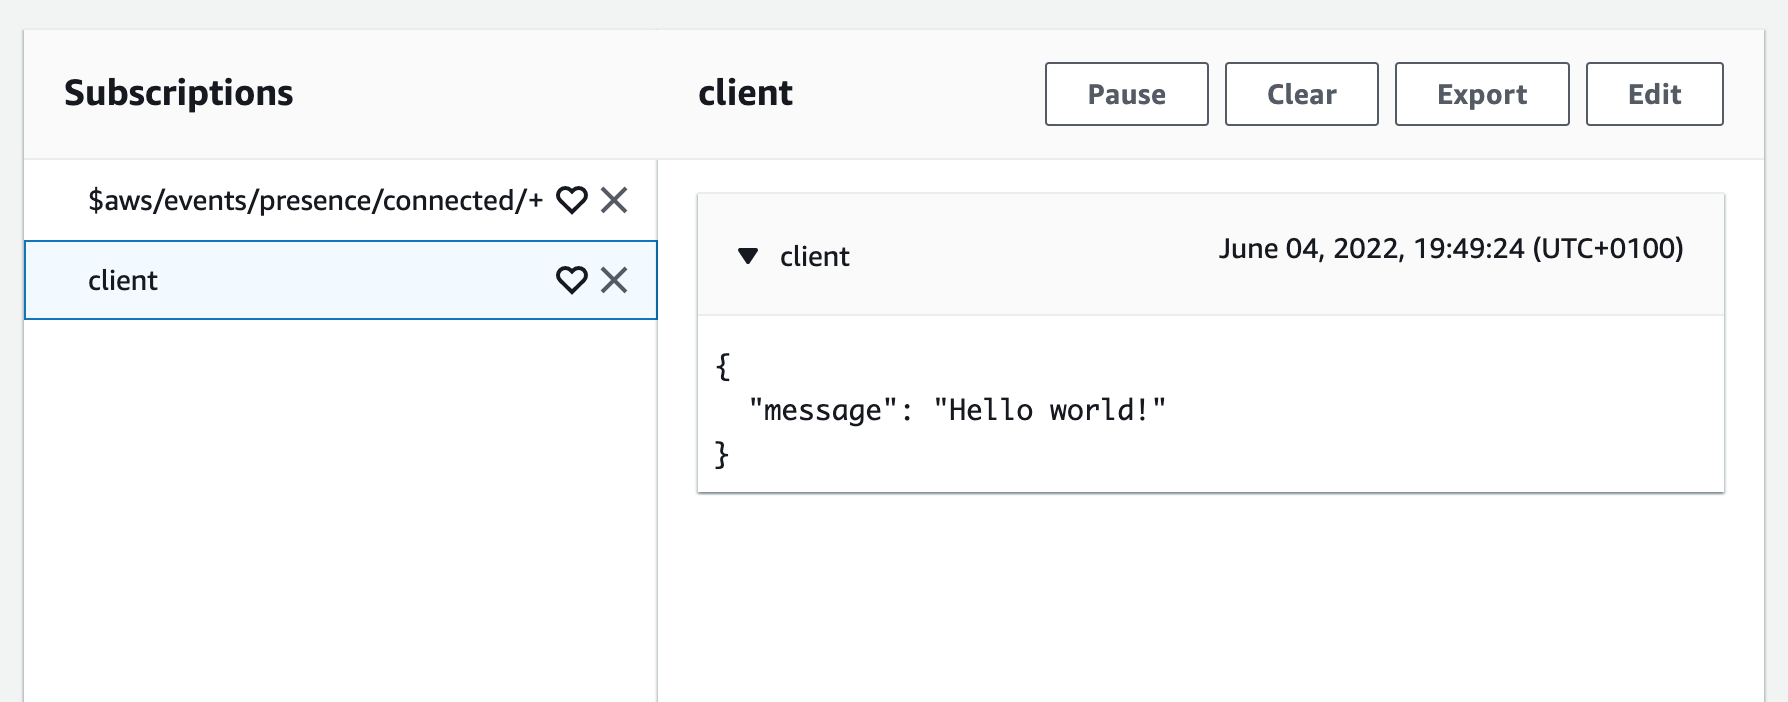
- Head to the MQTT test client again, and subscribe to
$aws/events/presence/connected/+(a lifecycle event using the + wildcard) as well as the topicclient. - Load the client you wrote.
- In the AWS Console, you should see a connection event, as well as your message!
<script src="https://unpkg.com/mqtt/dist/mqtt.min.js"></script>
<script>
  const IOT_ENDPOINT = "wss://ID.REGION.amazonaws.com";
  const client = mqtt.connect(`${IOT_ENDPOINT}/mqtt?x-amz-customauthorizer-name=Unauthenticated`, {
    clientId: "client-1",
    reconnectPeriod: 0,
  });

  client.publish("client", JSON.stringify({ message: "Hello world!" }), () => {
    console.log("Sent!");
  });
</script>
That's really all there is to it.
Making things more real
If you'd like to properly authenticate connecting clients, the Lambda we set up earlier gives you all of the power you need. Usernames, passwords or authentication tokens passed from the client can be inspected here and used to control what client ID the device can connect with, as well as what topics it can subscribe and publish to. This is also where something like AWS Cognito could be used in place of the Lambda for authentication. I didn't explore that here because I specifically wanted to avoid that complexity, but if user management is what you need, it's definitely worth looking in to.
To publish messages to clients from your backend infrastructure, you'll likely want to use the publish API endpoint instead of connecting directly. This should be available in all of the AWS SDKs.
You likely also want clients to be able to send data to the server. In the projects that I've worked on, I've used WebSockets purely as a broadcast mechanism, and used a standard HTTP API when clients need to respond. However, IoT Core has a powerful rules engine that you can use to invoke Lambda or other AWS services when a message is received: https://docs.aws.amazon.com/lambda/latest/dg/services-iot.html.
It's also worth mentioning - if you don't require authentication, you can replace the Lambda-based Custom Authorizer with a (free!) Cognito Identity Pool and make use of the unauthenticated role. Clients can call the Cognito API to request AWS Credentials ahead of connecting to IoT Core, allowing them to do so without going through an authorizer or ever invoking a function. I've used this in the past when I'd like to allow unauthenticated clients to listen to updates and I wanted to keep things simple.
Closing thoughts
I genuinely believe that IoT Core is a great solution for modern web apps, and I hope that this article helps to make the case for that.
There are two improvements that I'd love to see in the future, which I'll mention for full transparency:
- I wish I could use pure WebSockets instead of MQTT, or at the very least, that a lighter library existed for MQTT communication. MQTT.js is 236KB which is a larger bundle than I want to be including in any of my projects.
- It's not easy to determine how many clients are connected without tracking this yourself. While this is a hard problem in a distributed system, AWS could certainly track this internally and expose it via an API. I've previously worked around this using a DynamoDB table and inserting records as clients connect and disconnect.
Regardless, neither of these are things that have ever been blockers for me, and I think compared to some of the tradeoffs with other options these are definitely forgivable.
I'll close things out with a mention of James Beswick, who was really helpful to me on Twitter when I was first playing here a few years ago. If you're interested in more content along similar lines, consider this project, this article, or any of the many blog posts that appear when searching his name followed by "IoT Core".
As always, if you have any comments, feel free to reach out to @oliverdunk_ on Twitter. I'd be happy to chat!